From client details to an official form
Prepare a supported official form using saved record details and reviewed client answers. Keep supporting files on the case and check the final output before use.

Written by Michael Ruflin
Matter product guide · Published
Before you start
- You can edit the case and use Forms and Questionnaires in your workspace. Understand case forms
- The required official form and output action are available in the library. Check PDF output
- The client can access the requests you will send. Check client access
1. Check saved record details
Open the people, organisations, and case involved. Check the details already saved. For example, confirm that the applicant’s date of birth is on the correct contact record.
2. Find Forms and create the case form
Open Cases from the left sidebar, then open the case. Select Forms below the case title. Select Add case form, choose the supported official form, and check its name and linked records before creating it.
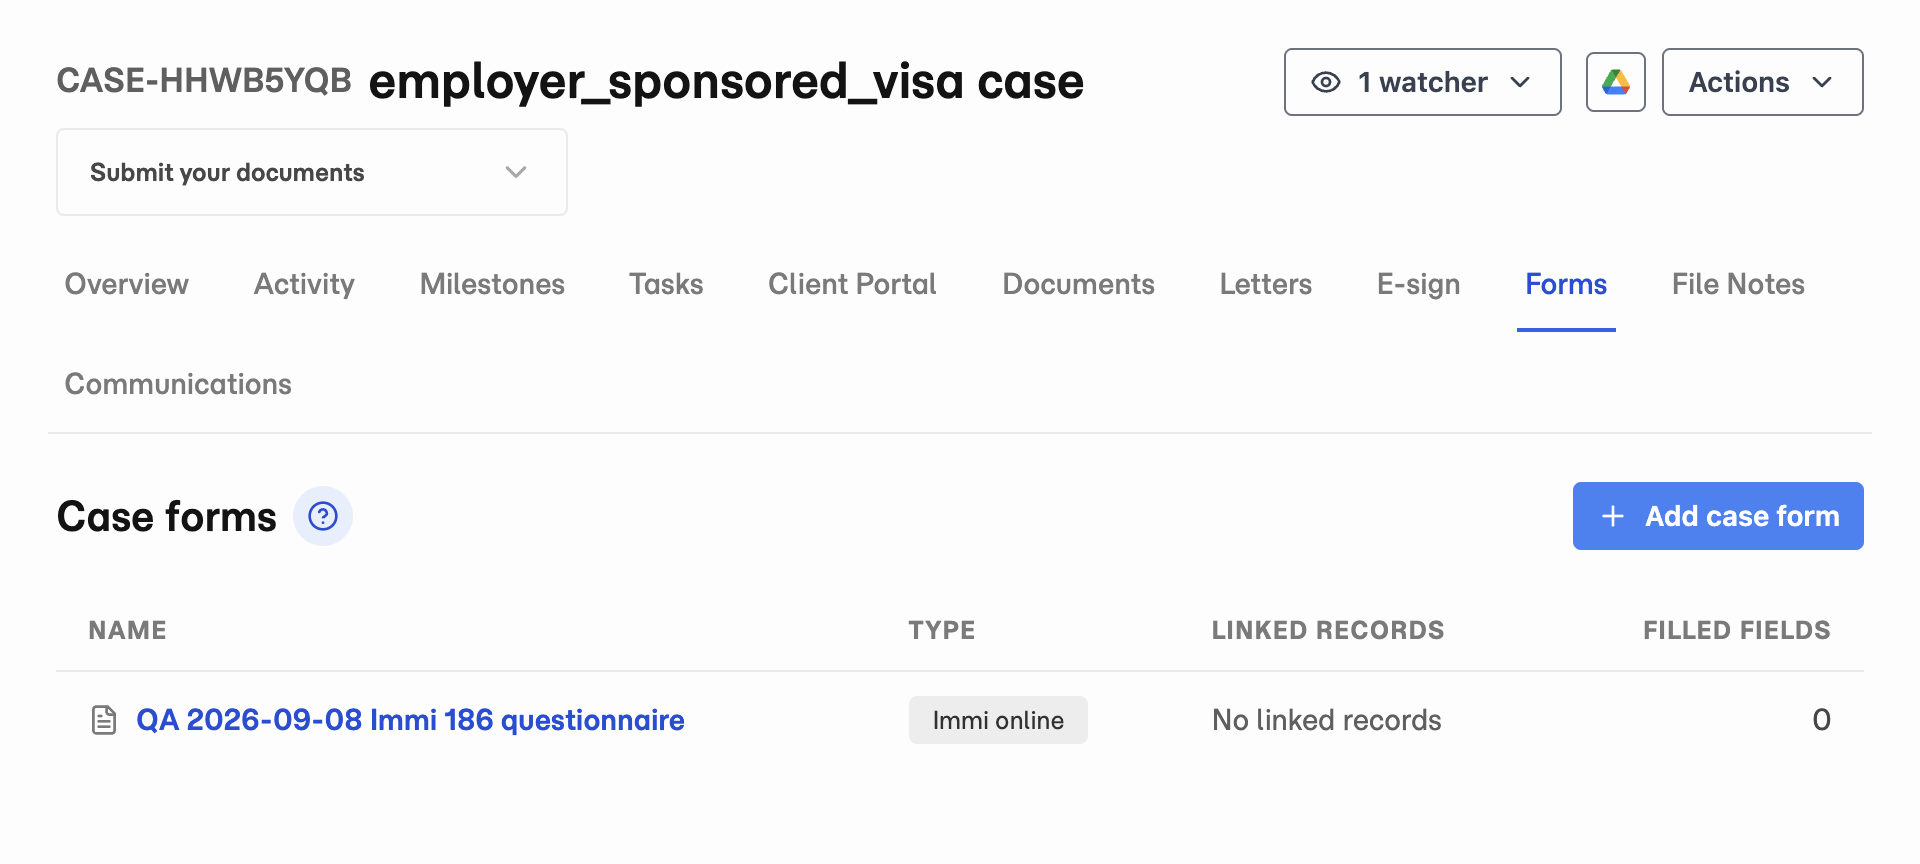
- 1 Open Forms on the case.
- 2 Select Add case form.
3. Check the linked records
Open Linked records on the case form. Check that each role refers to the correct person or organisation. Select Save linked records after changing the links.
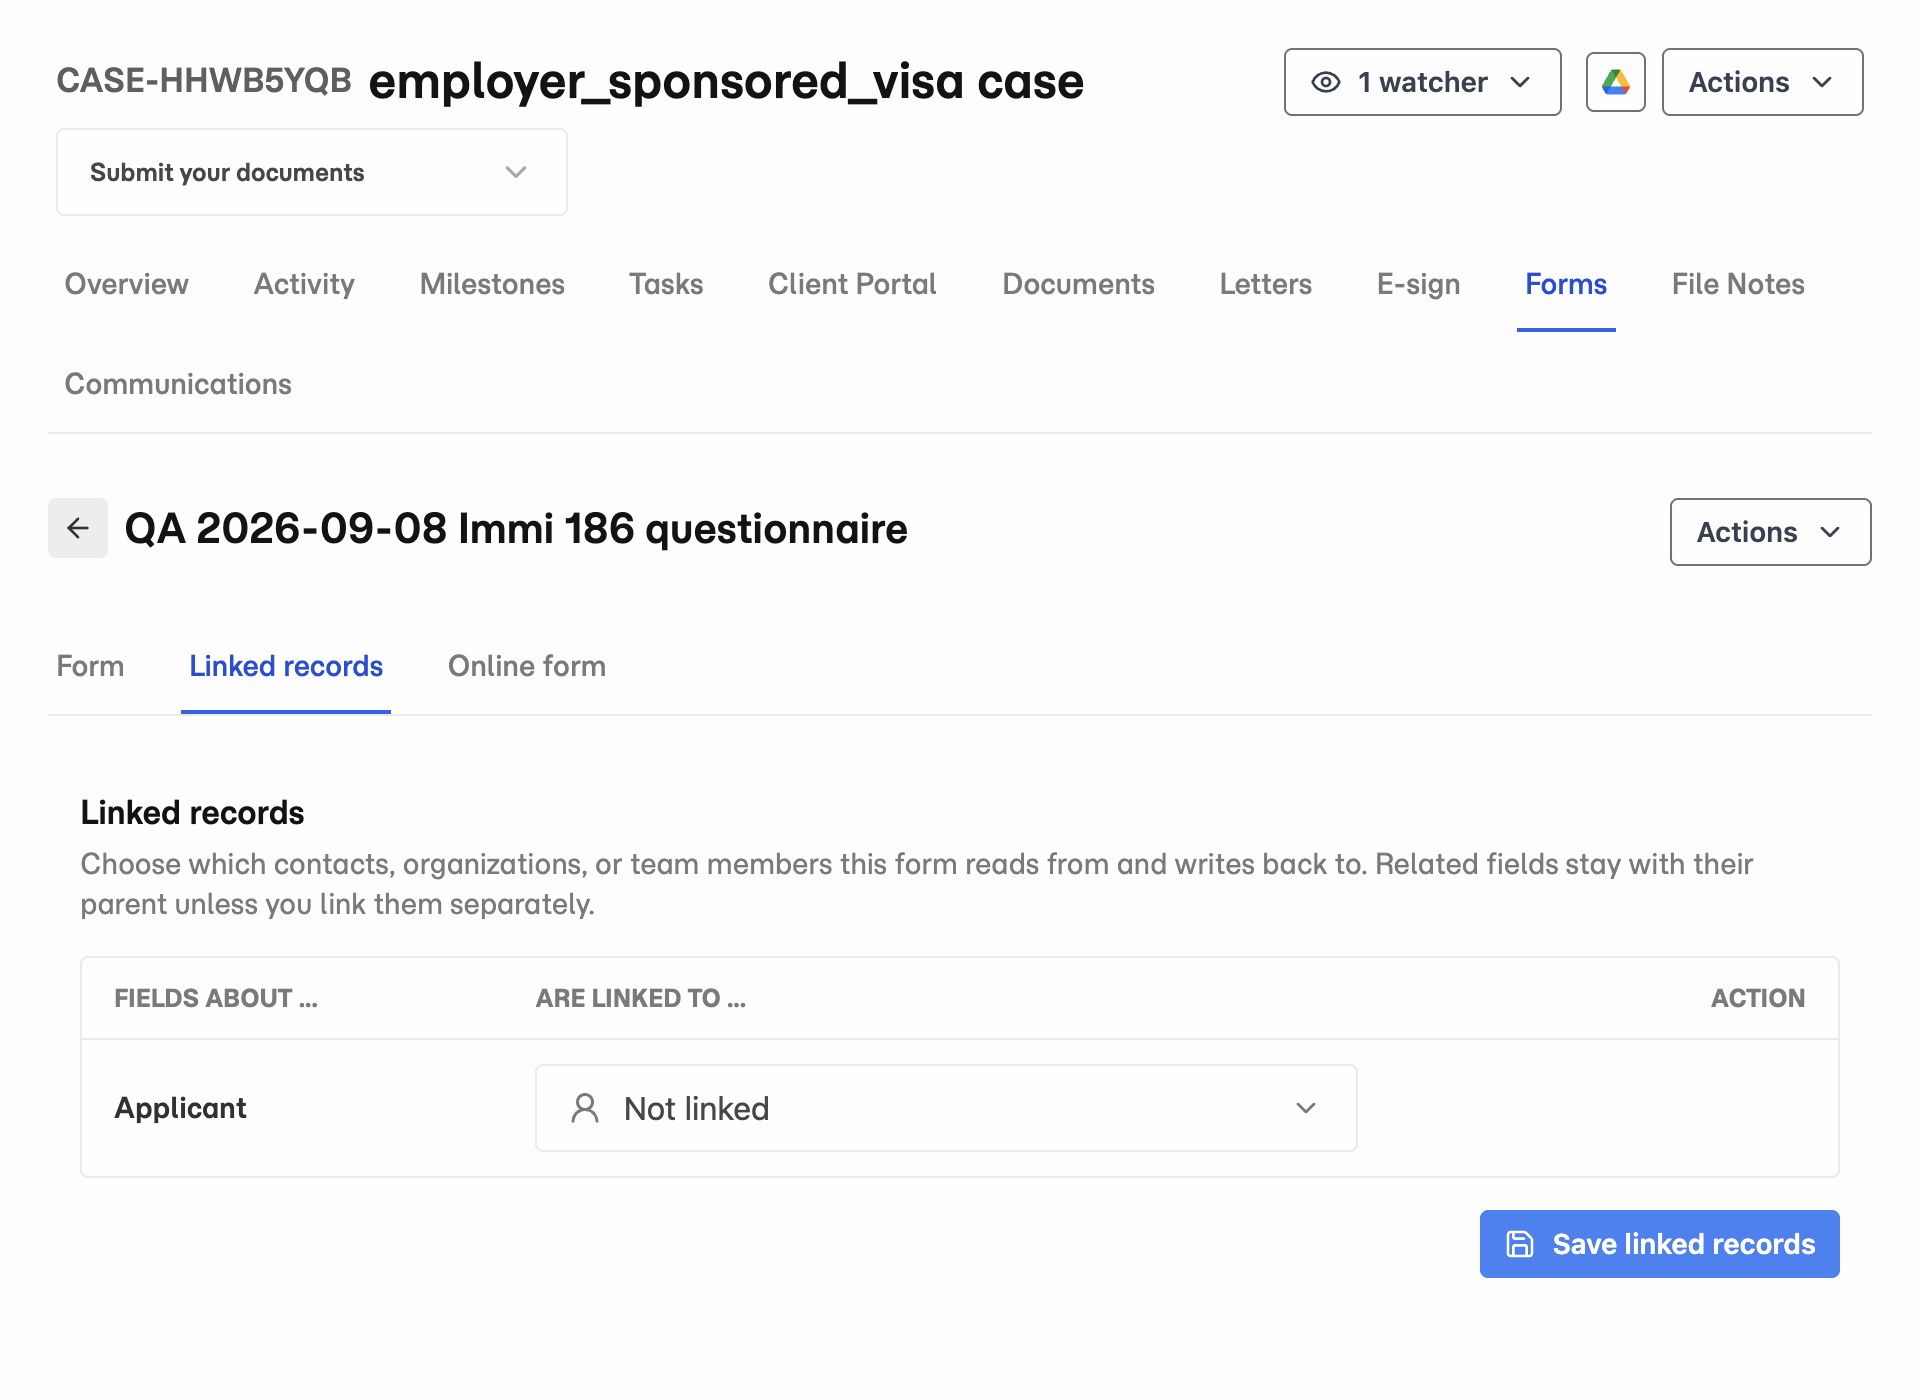
- 1 Open Linked records.
- 2 Choose the applicant, then select Save linked records.
4. Copy available details into the form
On the Form tab, select Actions beside the form title, then Copy values. Choose Linked records and case fields. Check the direction, run the preview, and select what to transfer. Apply the operation and check the form answers.
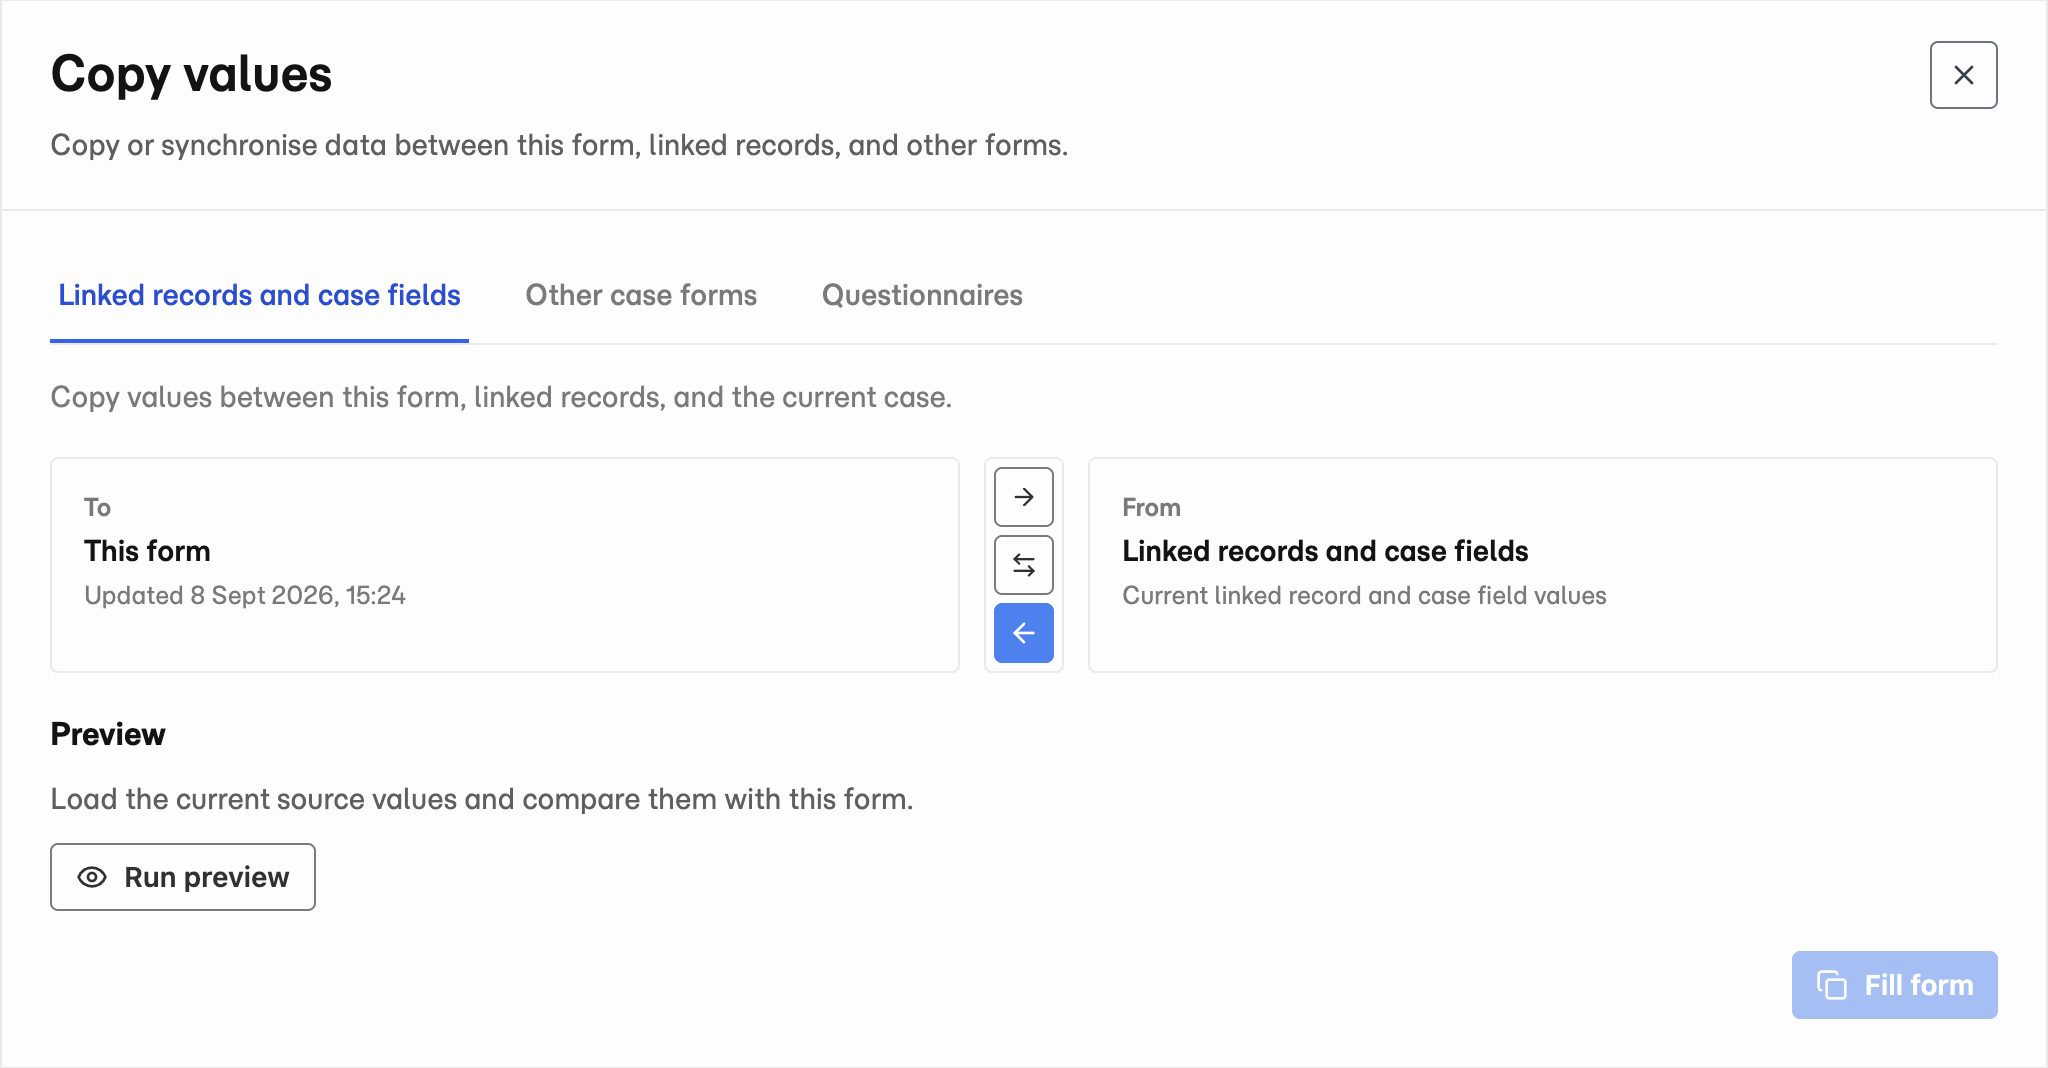
- 1 Choose the copy source.
- 2 Check From, To, and the arrow direction.
- 3 Select Run preview before copying values.
5. Choose a predefined questionnaire
Open Client Portal on the case and select the document group. Select Actions beside the group name, then Create questionnaire. Choose a predefined template and link the relevant records. Review the request details, questions, and client access before notifying the client.
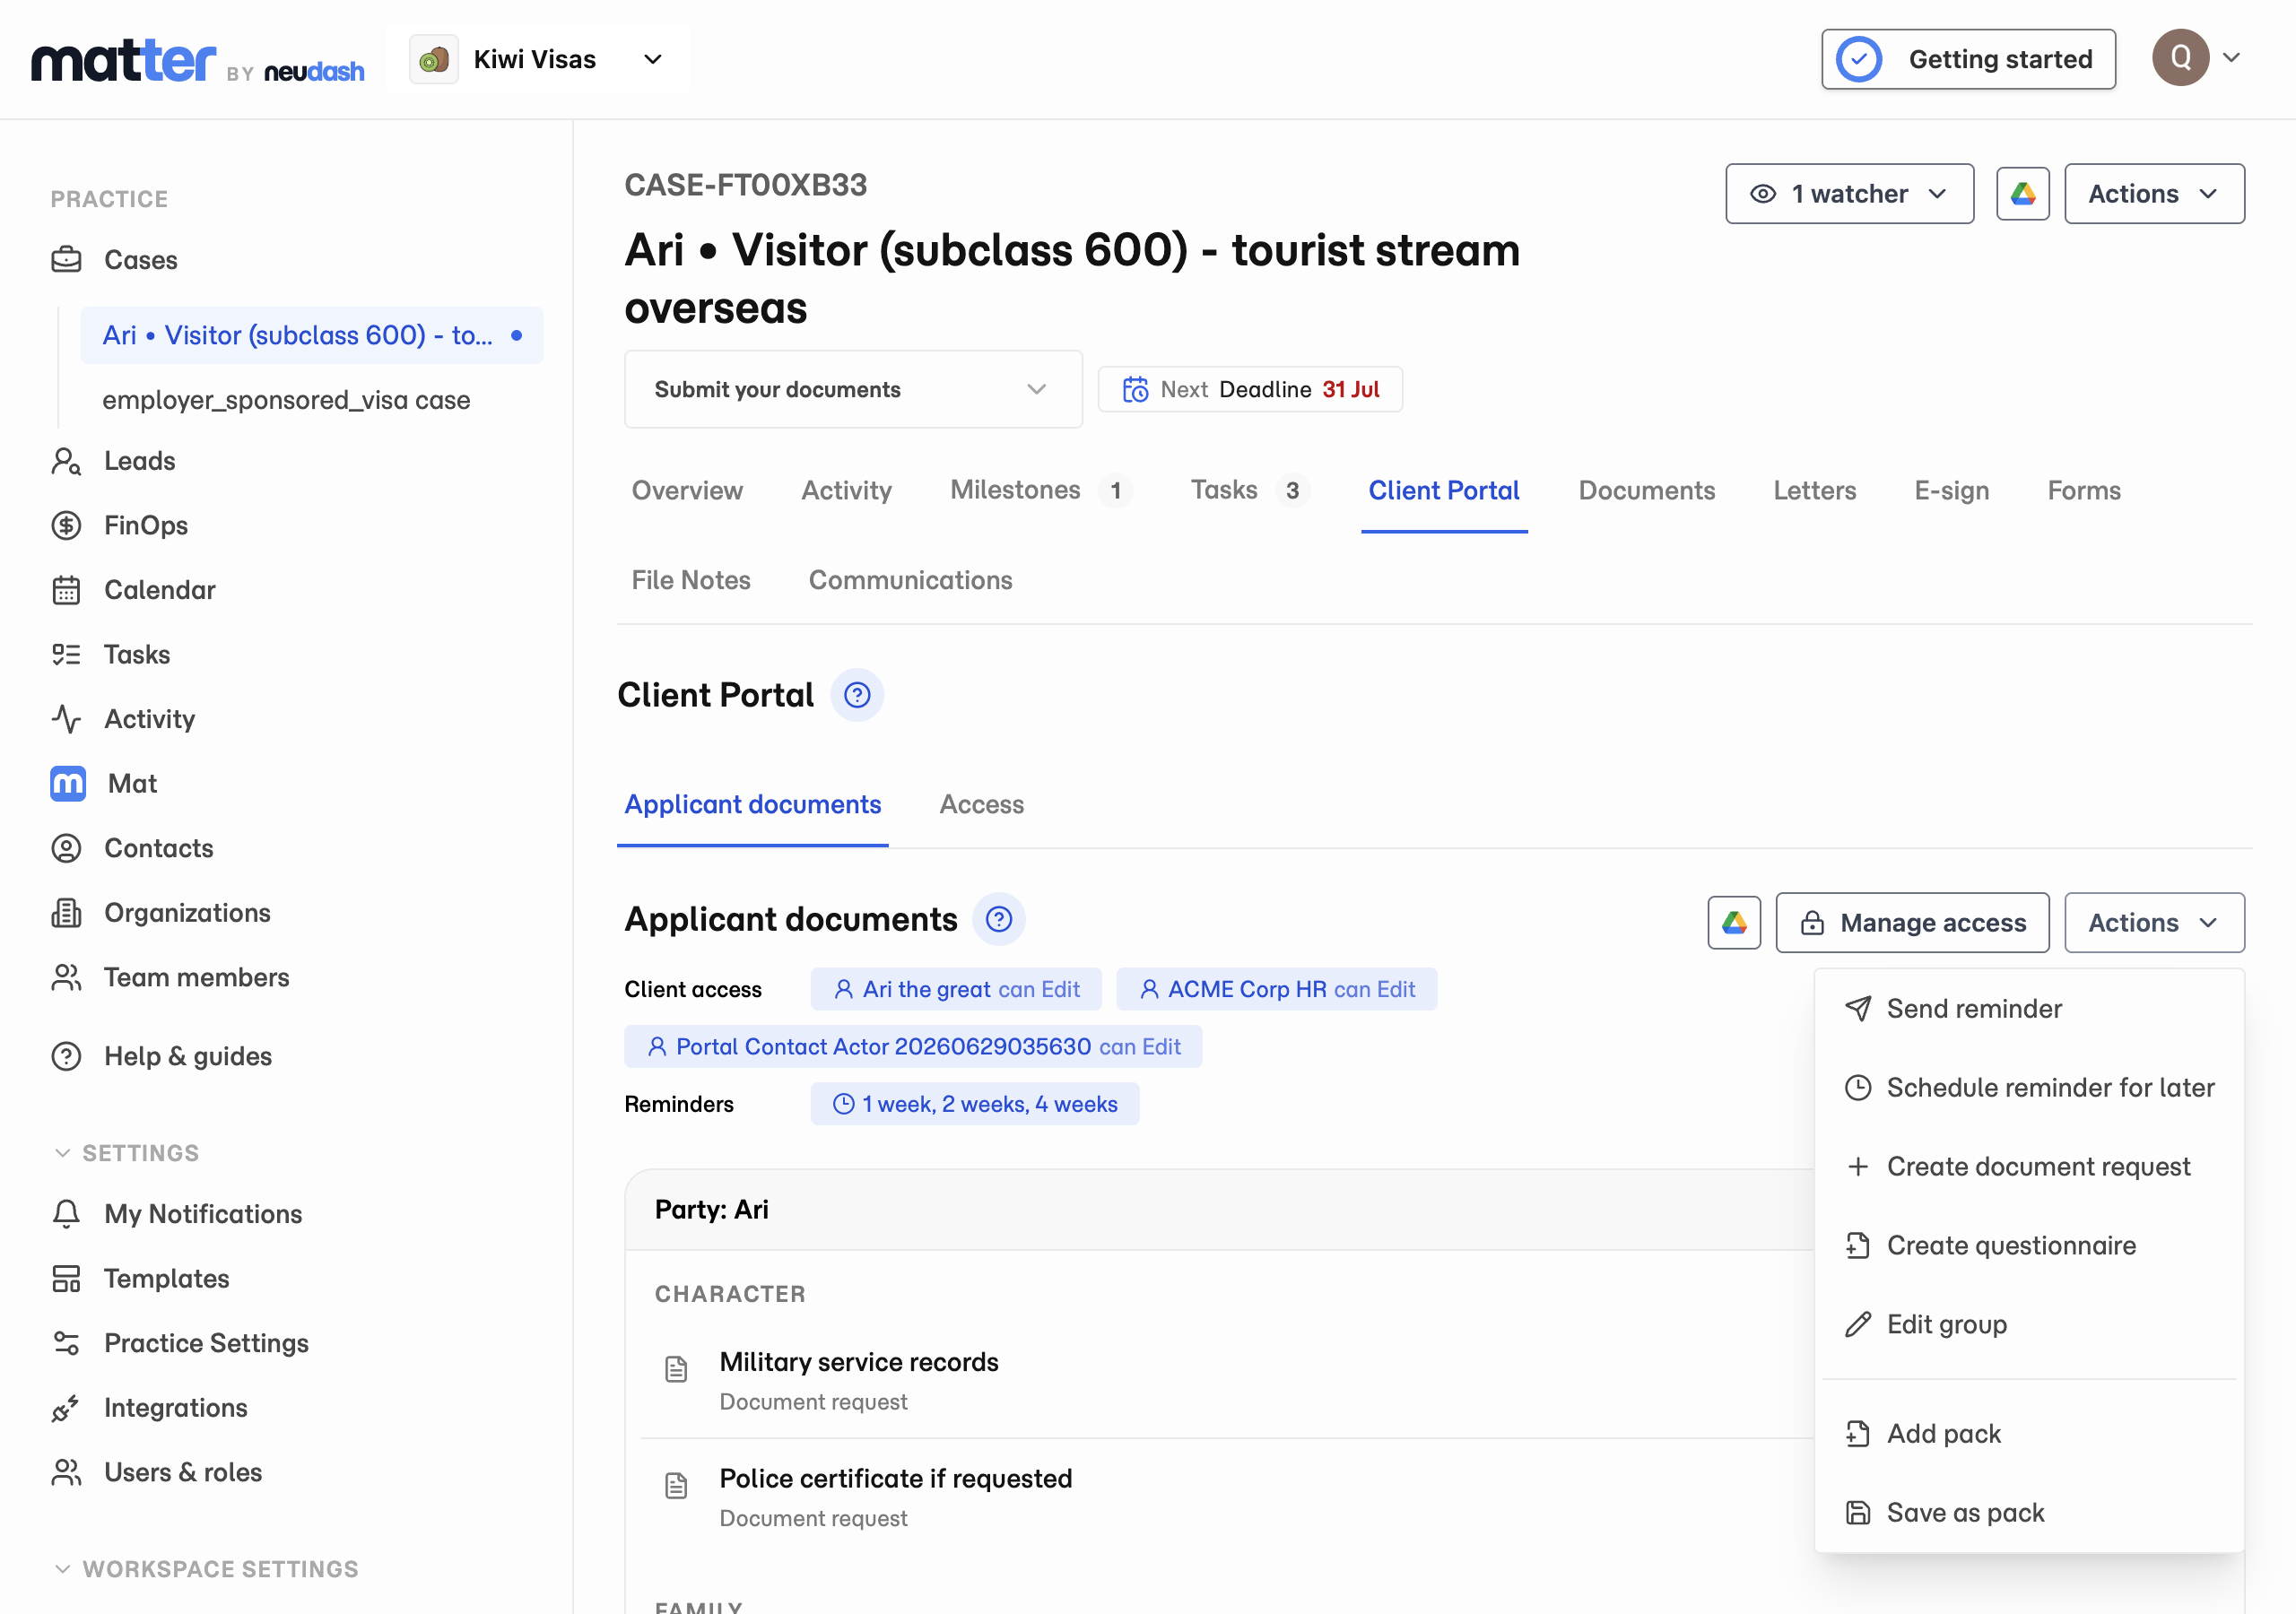
- 1 Open Client Portal and select the document group.
- 2 Open the group’s Actions menu.
- 3 Select Create questionnaire.
6. Collect supporting files
Add document requests for the evidence the case needs. For example, request the passport file as well as its details. Review uploads separately from questionnaire answers.
7. Review and apply submitted answers
Review submitted answers and request corrections where needed. In Apply values, check destinations before updating saved details. Open Copy values on the case form to copy compatible answers. Check the result and enter remaining answers directly.
8. Prepare the supported output
For a PDF form, open PDF, review the preview, and use Export Form to save it to the case. For an online form, open Online form and connect the ImmiAccount application. Compare answers before transferring changes.
Choose PDF or online preparation
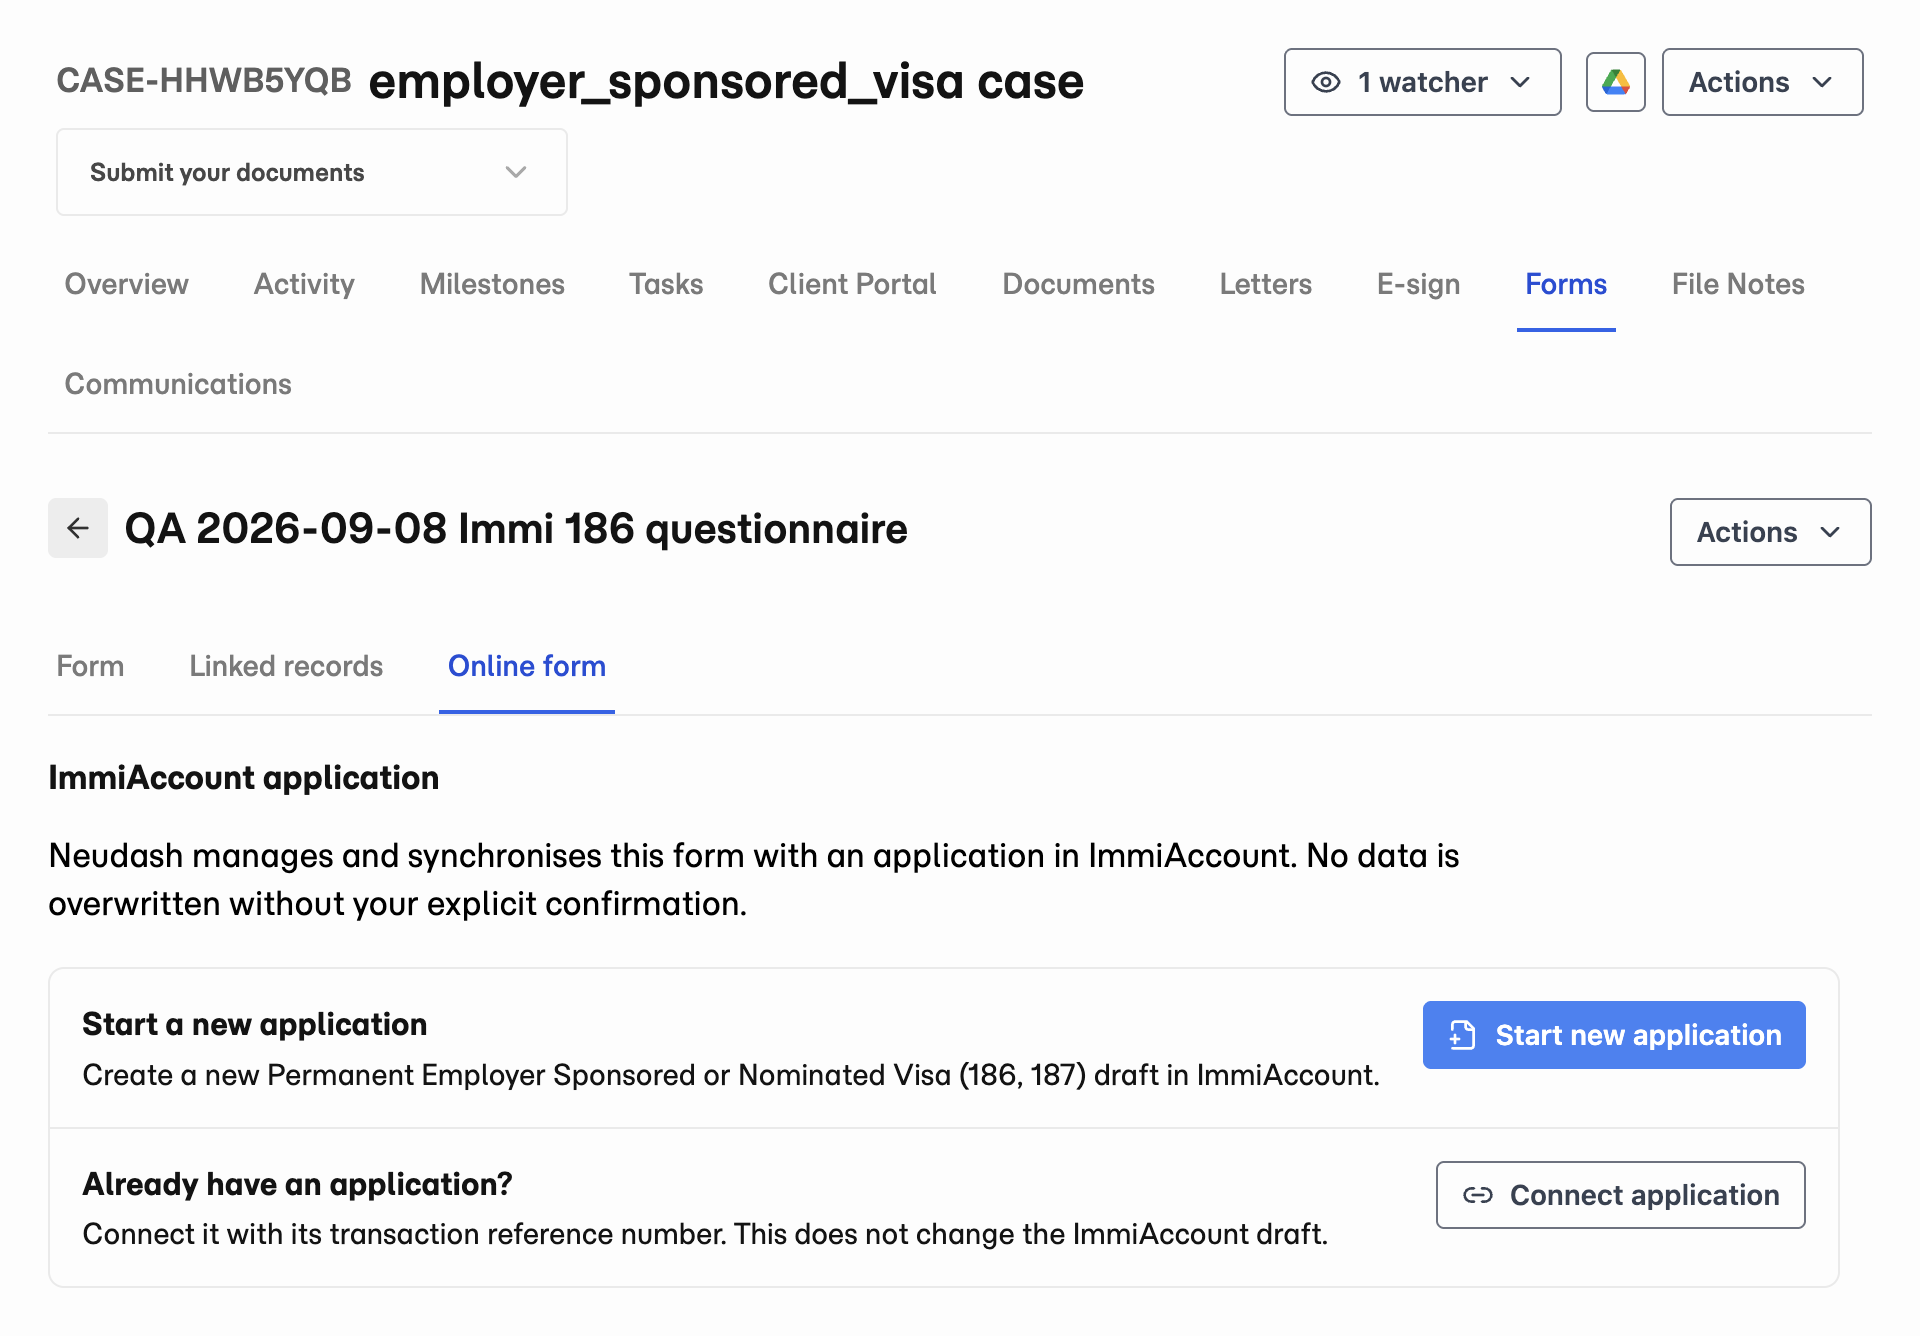
- 1 Open Online form.
- 2 Choose Start new application or Connect application.
9. Check the form and supporting evidence
Review the generated PDF or ImmiAccount application. Check unanswered questions, reported omissions, and supporting files. Confirm required attachments in ImmiAccount separately. Form preparation does not submit or lodge the application.