Give a client access to a document group
Give a client access to the case. Choose which document groups the client can open and whether the client can add documents.

Written by Michael Ruflin
Matter product guide · Published
Before you start
- The client has a contact record in Matter.
- The client's email address is saved in Matter. Add or change a client email address
- The document group has been created.
1. Open the Access page
Open the case and go to the Access settings in Client Portal.
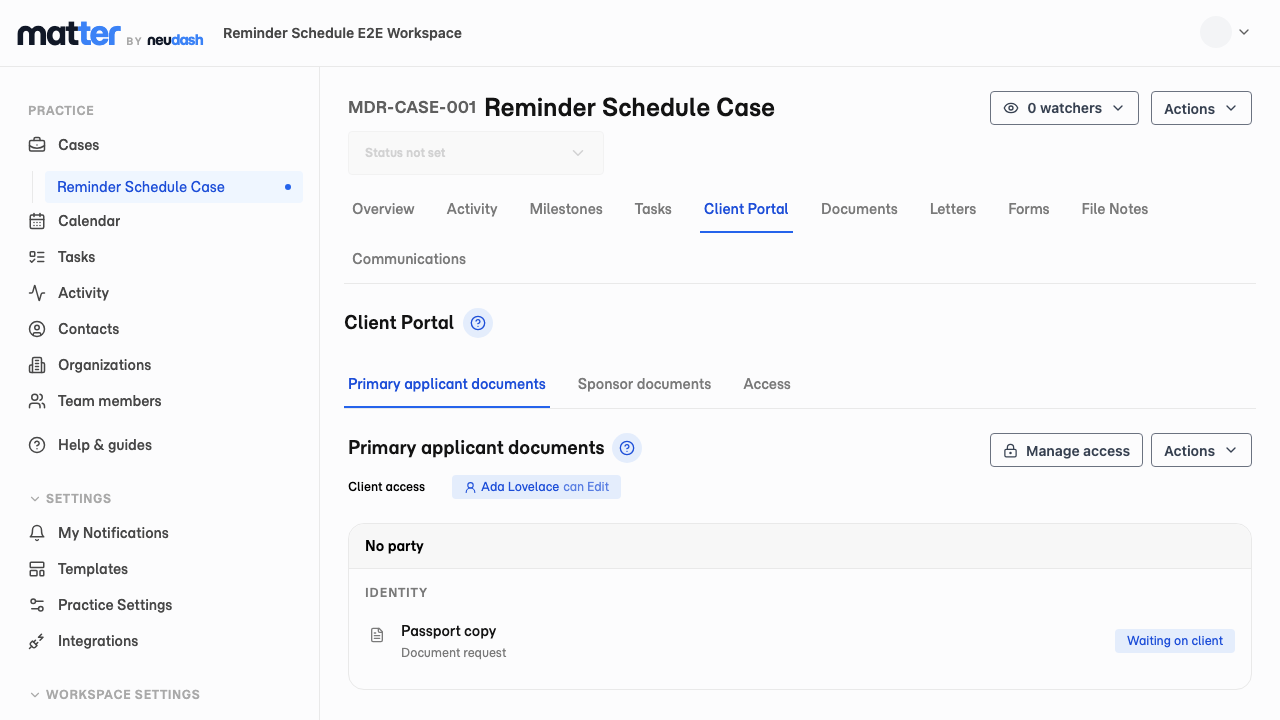
- 1 Select Client Portal
- 2 Select Access
2. Start adding access
Start a new client access setup from the Access page.
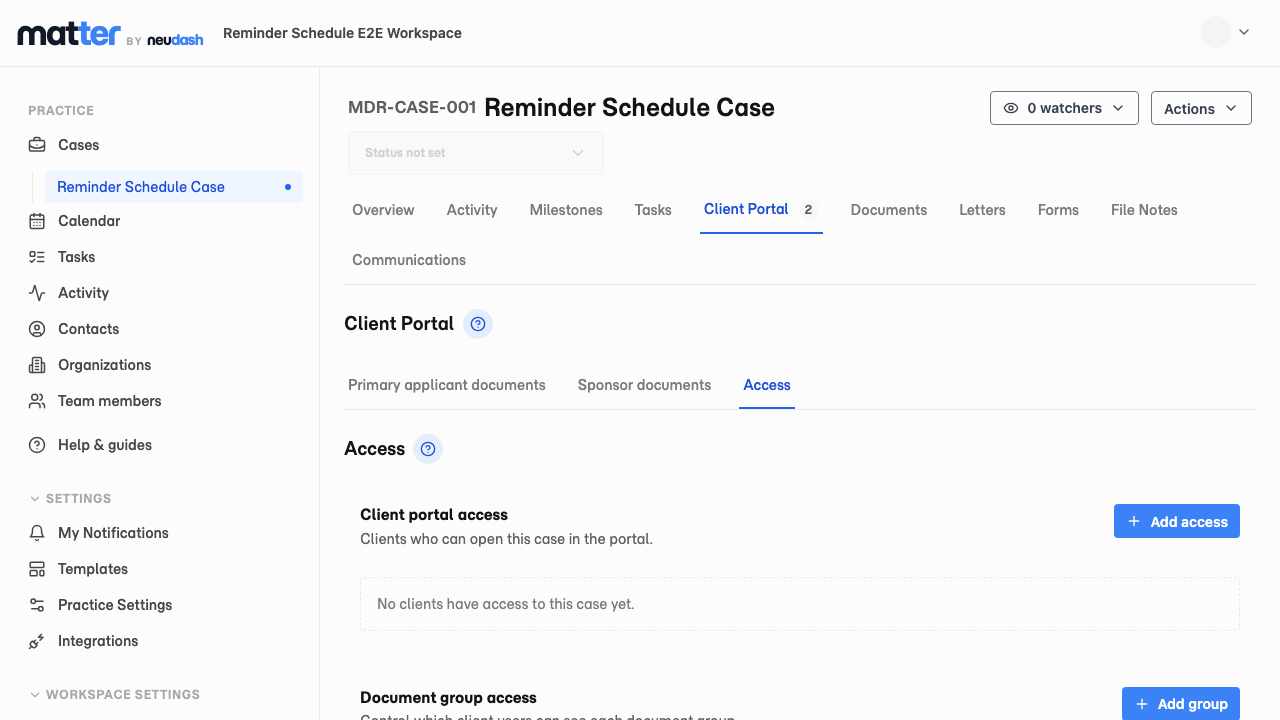
- 1 Select Add access
3. Set the permissions
Choose the client, document groups, and permissions.
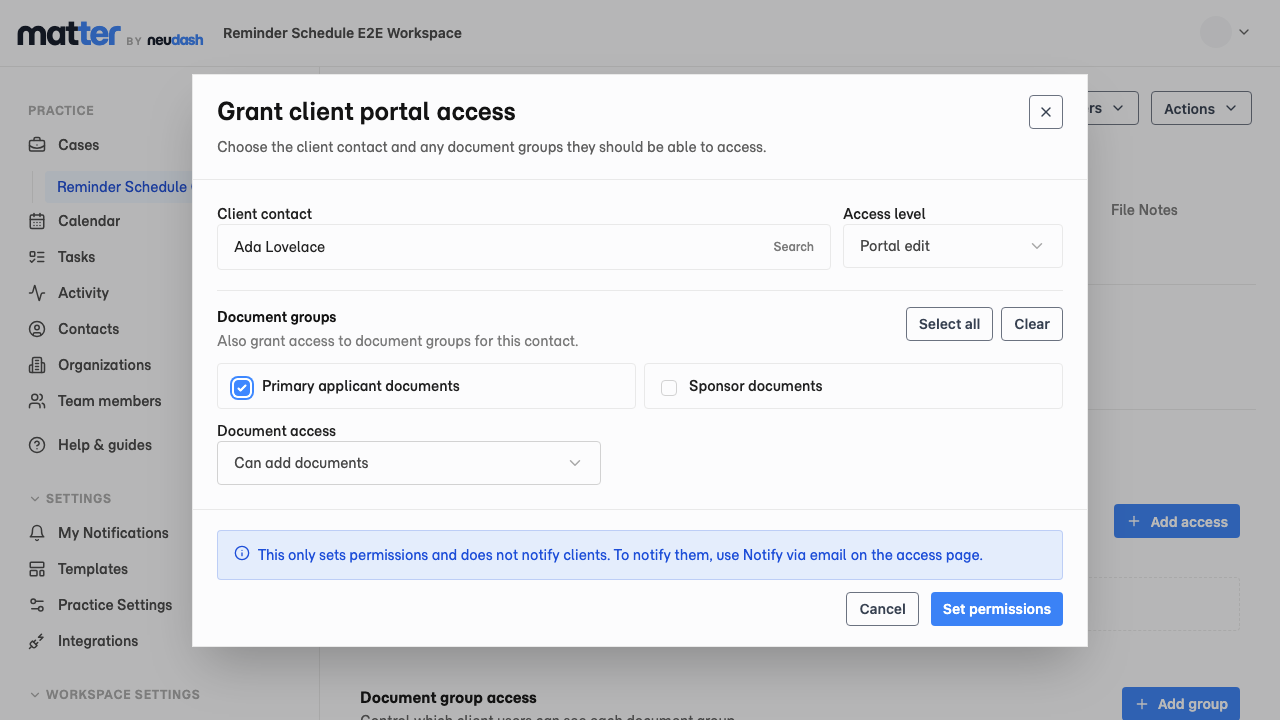
- 1 Choose the client and access level
- 2 Choose the groups under Document groups
- 3 Select Set permissions
4. Check and notify the client
Confirm the saved access. Check the client view before you notify the client.
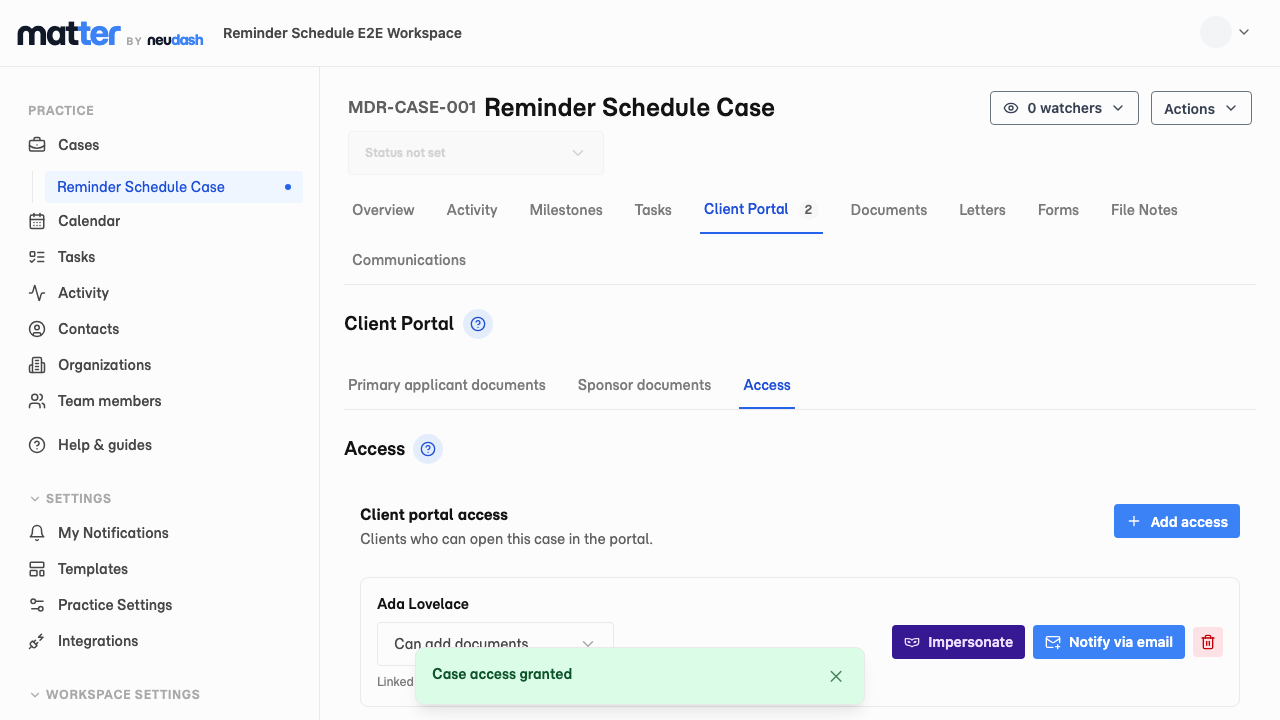
- 1 Check the saved access
- 2 Select Impersonate to see what the client sees in the portal
- 3 Select Notify via email to send the client a link to open the portal